TOOLSDEBUG MODE
Debug mode
Debug mode is a panel for trying the plugin on a live body, without a test drive. Crushform.DebugMode opens it over the game. It gives you a free camera, a target, and tools that dent, dirty, wash, break glass and drop the body, plus overlays that show the lattice, the stiffness zones and the tyres. Run the command again to close it.
What it does
Section titled “What it does”The panel is titled CRUSHFORM DEBUG. Its sections are titled in capitals: TARGET, TOOLS, DAMAGE, DIRT, WORLD, VIEW, TIME and INFO.
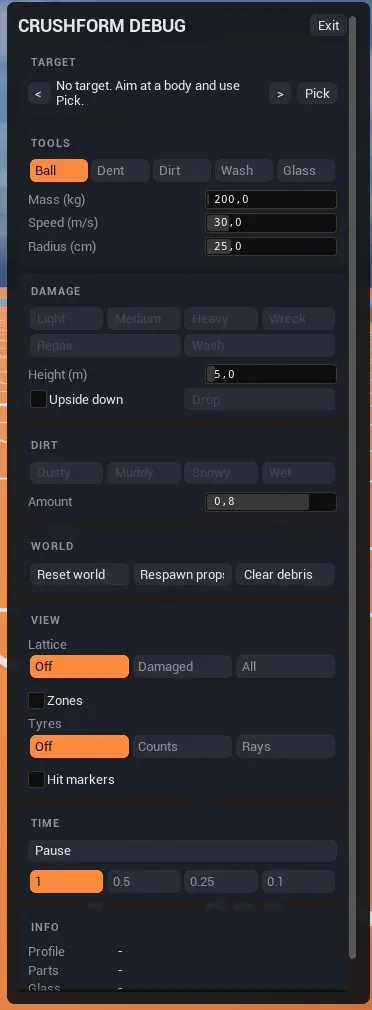
- TARGET: click Pick, then aim with the right mouse button held and click the body. Or step through the bodies in the level with
<and>. - TOOLS: Ball throws a ball at the body, Dent dents it at a chosen impact speed, Dirt brushes dirt on, Wash brushes it off, and Glass cracks or breaks the glass at the crosshair.
- DAMAGE: Light, Medium, Heavy and Wreck apply a set of hits. Repair straightens the body, Wash cleans it, and Drop lifts the body to a height and lets it fall.
- DIRT: Dusty, Muddy, Snowy and Wet fill the body with that mix, at an Amount you set.
- WORLD: Reset world, Respawn props and Clear debris.
- VIEW: four overlay switches, described under How it works: Lattice, Zones, Tyres and Hit markers.
- TIME: Pause, Resume and Step (one frame) control the pause of the world. The speed buttons 1, 0.5, 0.25 and 0.1 set the time dilation. When the game or another player holds the pause, the panel says so instead.
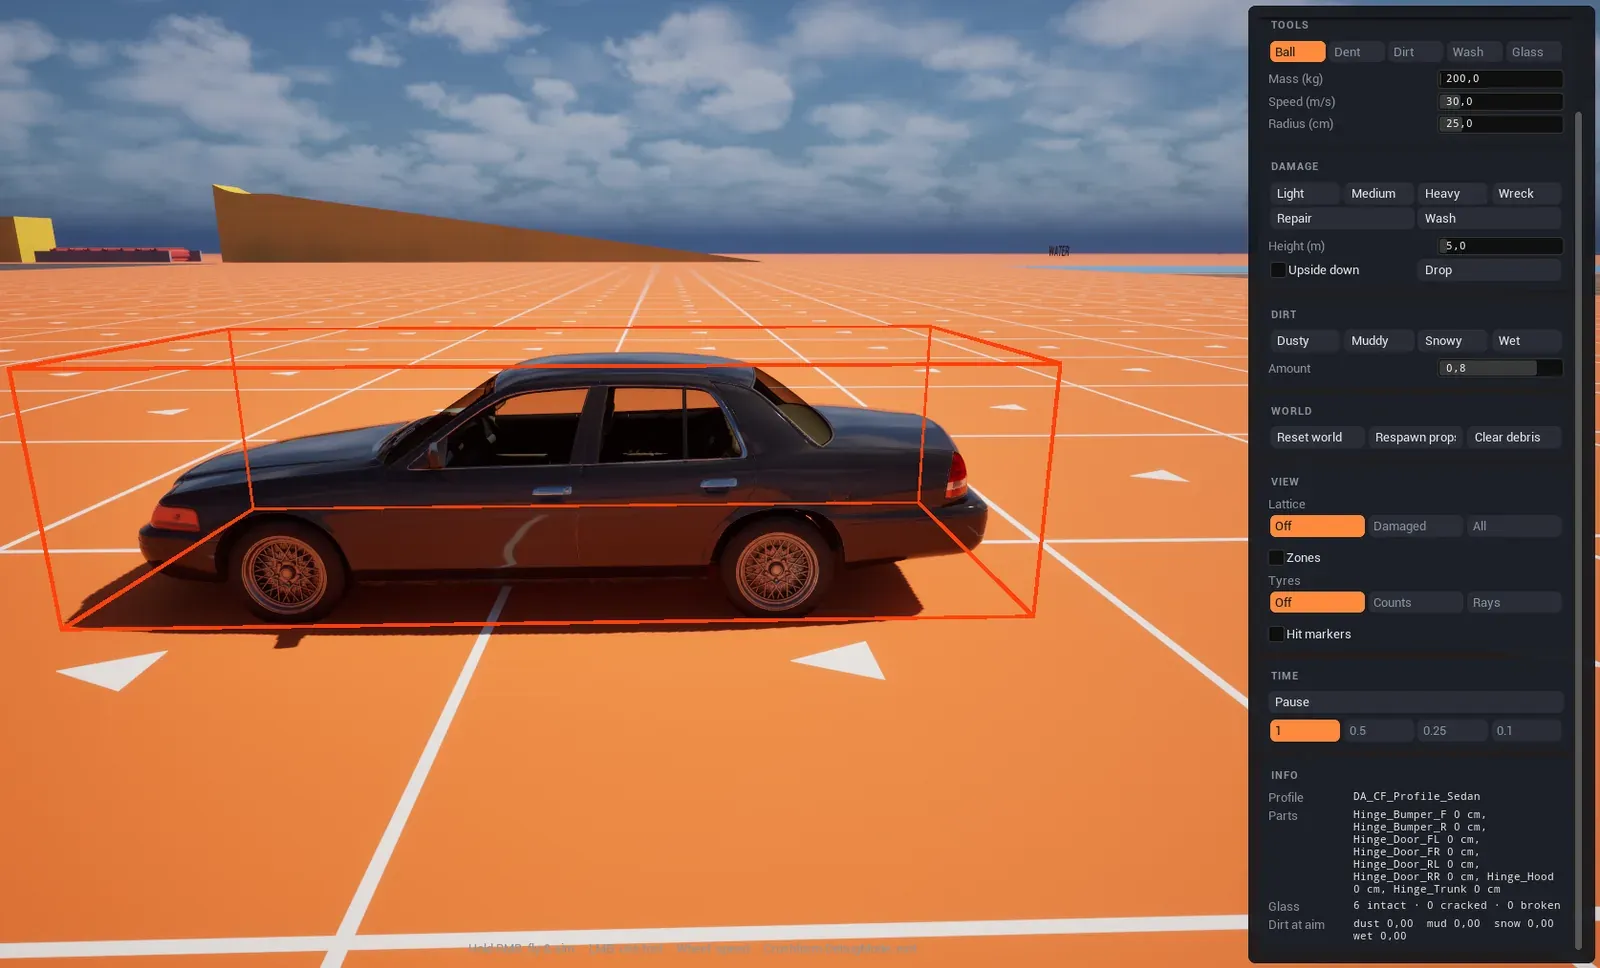
- INFO: the target’s Profile, its Parts that are off or bent, its Glass counts and the Dirt at aim.
How it works
Section titled “How it works”The mode runs on your local player. While you hold the right mouse button you fly and aim: the W, A, S, D, E and Q keys move the camera, and the mouse wheel changes the fly speed. The left mouse button uses the selected tool at the crosshair. Releasing the right mouse button stops the flying.
The panel refreshes the target’s state while it is open. Its INFO section shows the profile, the parts that are off or bent, the glass count and the dirt at the aim.
The damage and repair buttons, and the world buttons, run on the server through the plugin’s relay. A client can use them only when the server allows it. The server allows its own player always, and remote clients by default; see Key settings. When it refuses, the panel prints Server tools unavailable.
The VIEW section switches four overlays on and off:
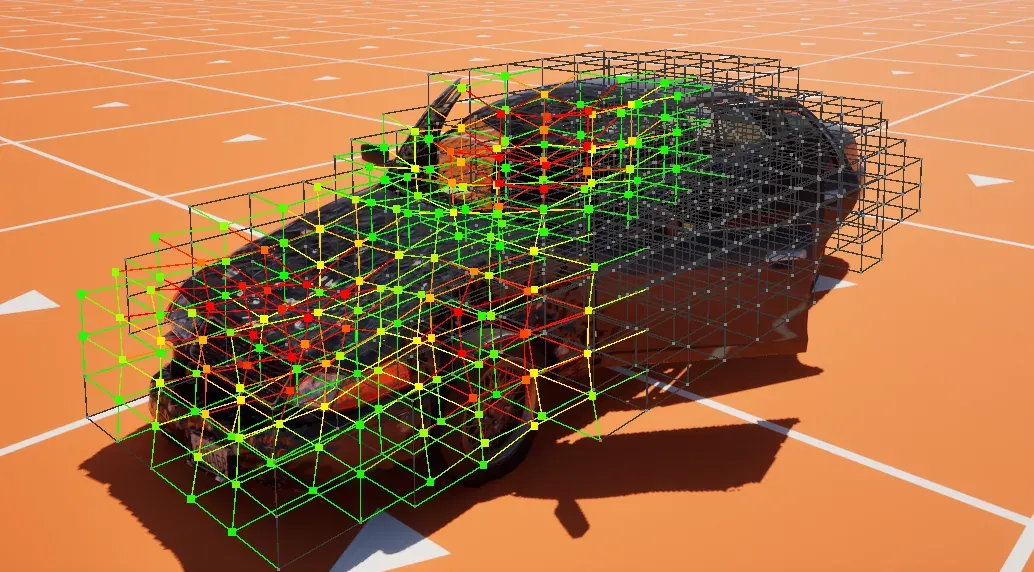
- Lattice (
Crushform.Debug): Off, Damaged or All. It draws the lattice nodes and the beams between them. - Zones (
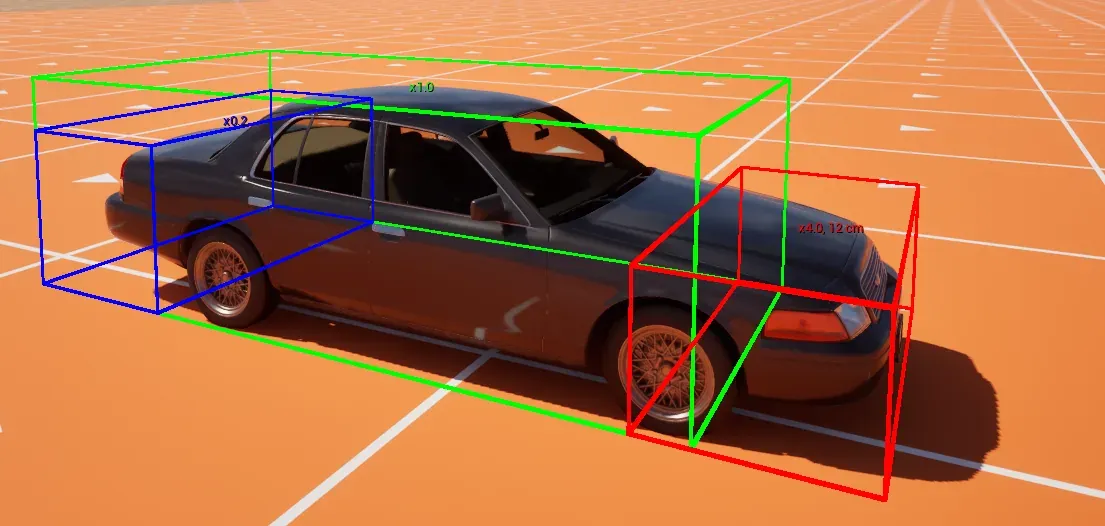
Crushform.ShowZones): the stiffness zones of every damageable body, as boxes. - Tyres (
Crushform.Tire.Debug): Off, Counts or Rays. Counts shows the on-screen tyre counts. Rays also draws the rays of each deforming tyre. - Hit markers (
crushform.Impact.LogHits): a marker where each hit lands.
Set it up
Section titled “Set it up”Nothing to create. The mode works on any body that has a Crushform deform component, such as a vehicle with the adapter, or a prop.
- Use a build other than Shipping. The debug module is not in Shipping builds, so
Crushform.DebugModeis not there. It works in every build except Shipping, and in the editor. - Open a level with a Crushform body. The plugin’s
/Crushform/ProvingGround/Maps/Lvl_ProvingGroundhas one, and so does your own level once you have set up a vehicle, as in Your own vehicle. - Press Play In Editor. Open the console with the tilde key and run
Crushform.DebugMode. - Click Pick in the TARGET section. Hold the right mouse button to aim at the body, then click the left button: the body under the crosshair becomes the target, and the tool goes back to the one you had selected. Or step to a body with
<and>. Then press Heavy under DAMAGE.
Use it
Section titled “Use it”On Blueprint. The mode has no Blueprint functions. From a Blueprint, run the console command with the engine’s Execute Console Command node, in the Development category. The graph below runs it from a custom event:
In C++. Get the mode from the local player, and call its functions. The mode is a ULocalPlayerSubsystem:
#include "CFDebugModeSubsystem.h"
UCFDebugModeSubsystem* Mode = LocalPlayer->GetSubsystem<UCFDebugModeSubsystem>();if (IsValid(Mode)){  Mode->Toggle();        // Enters the mode when it is off, exits it when it is on.  const bool bOn = Mode->IsActive();}
Enter() and Exit() do the same without the toggle. The module CrushformDebug is not built in Shipping; see Installation for the dependency rules.
Key settings
Section titled “Key settings”| Property | What it does | Default |
|---|---|---|
Crushform.DebugMode.AllowClients | Whether the server runs the debug tools for remote clients (1) or only for its own local player (0). | 1 |
Crushform.Debug | The lattice overlay: 0 off, 1 damaged nodes, 2 all nodes. | 0 |
Crushform.ShowZones | The stiffness zone overlay: 0 off, 1 on. | 0 |
Crushform.Tire.Debug | The tyre overlay: 0 off, 1 counts, 2 rays. | 0 |
crushform.Impact.LogHits | The hit markers: 0 off, 1 on. | 0 |
The VIEW section sets these CVars, so the panel and the console agree.
Check that it works
Section titled “Check that it works”Run Crushform.DebugMode in Play In Editor. The CRUSHFORM DEBUG panel opens, with its sections and an overlay hint at the bottom of the screen. Click Pick, hold the right mouse button, aim at a Crushform body and click the left button. The TARGET row shows its name, and INFO shows its profile. Press Heavy: the body dents, and with Lattice set to All in VIEW, you see the lattice nodes move. Run Crushform.DebugMode again to close the panel.
Troubleshooting
Section titled “Troubleshooting”Crushform.DebugMode does nothing in a packaged build.
Cause: the CrushformDebug module is not in Shipping builds, so the command is not registered there.
Fix: use a build other than Shipping. Do not make shipping code depend on this module.
The Output Log prints this line:
Crushform.DebugMode: no local player in this world.Cause: the command ran in a world without a local player, such as a dedicated server. Fix: run the command in a client window, or in the editor’s Play In Editor window.
The panel shows Server tools unavailable, and the server-side buttons are greyed out.
Cause: the server runs with Crushform.DebugMode.AllowClients set to 0, and you are a remote client.
Fix: set it to 1 on the server, or run the tools on the server’s own player.
The dent buttons are greyed out. Cause: the target is missing, or its profile has Dents off. The panel then shows Dents off next to the target’s name. Fix: pick a body that has a profile with dents on, or turn Dents on in its profile.